Showing posts with label accessories. Show all posts

Tuesday, September 6, 2016

Doctor Who Cosplay - Vortex Manipulator and Pattern

I do so many little projects for myself, my kids, or friends, and I've decided to start sharing the patterns I create so others can create with them as well.


Last year I made myself a costume for Halloween.  It was a steampunk version of River Song.  I made a leather vortex manipulator to go along with the costume.  I've turned it into a PDF pattern and listed it for sale in my Etsy shop.  Click the image below to check it out!


Thursday, January 17, 2013

Necklace Alteration -- Two from One

Has anyone else discovered the Styled by Tori Spelling line of jewelry?  I really like a lot of the designs, but I've found that using the system as-is makes necklaces that end up being an awkward length, or I would like it to be just a little bit different.  Whenever something like that happens I usually just end up doing what it takes to make it the way I want it.

Take this necklace, for instance.

Cat on a Limb-0658.jpg

I loved the open metal flowers, but personally, I felt like the Y style didn't quite work here. So I decided to take off the dangling part in the middle and make two different necklaces.

I attached the middle portion of the original necklace to a long-ish chain using jump rings and made a closure and extension (like in this post).

Cat on a Limb-0659.jpg

Draped Chain Necklace 9 - Cat on a Limb

I created it in such a way that the flowers would hang to one side of the necklace instead of in the center.

While wearing it I noticed the flowers would twist and turn a lot, so I added another jump ring between the flowers, which helped it stay flat.

Cat on a Limb-0663.jpg

Cat on a Limb-0664.jpg

Cat on a Limb-0665.jpg

For the second necklace I attached a pre-made "necklace top" from the Styled collection, which I shortened to make the center of the necklace lay just below my collar bone.

Cat on a Limb-0662.jpg

Using jewelry wire cutters I clipped the extra loop off of the center flower.

Cat on a Limb-0661.jpg

As you can see it left a couple of barbs sticking out. I used a small rotary tool (kind of like a Dremel, but way cheapy, although it still did the job) and ground them down until it was smooth.

Cat on a Limb-0666.jpg

Cat on a Limb-0667.jpg

Cat on a Limb-0668.jpg

Which gave me my second necklace.

Cat on a Limb-0669.jpg

Two for the price of one... gotta love that! Has anyone else had projects where you were able to get two from one?

-------------------------------------------------------------------
I'll be linking up to these fabulous link parties:

Monday -  Craft o Maniac Monday -- Craftastic Monday --nbsp; Tuesday -  Get Your Craft On -- Sew Cute Tuesday -- Tuesday Talent Show --  Wednesday -  Sugar and Dots -- Your Whims Wednesday -- Create and Share -- Whatever Goes Wednesday --  Linkin’ with Lil’ Luna -- Thursday -  Strut your Stuff Thursday -- Transformation Thursday -- Thrilling Thursday -- Make It Wear It -- The 36th Avenue Party Time -- Friday -  Flaunt it Friday -- Frugal Friday -- Weekend Wander -- Tickled Pink Fridays -- Weekend Wrap-up Party -- Catch as Catch Can -- Friday Flair -- Feature Yourself Friday -- Simply Link {Party} -- Pity Party -- Frugalicious Friday --  Saturday - Strut Your Stuff --  Lovely Crafty Weekend --  Sweet Saturday -- Sunday -  The DIY Showoff Project  Parade --  Sunday Showcase Party -- Creative Bloggers Party -- I Heart Naptime -- Think Pink Sundays

Tuesday, January 1, 2013

Draped Chain Necklace and Happy 2013!

Happy new year everyone!!  

I, for one, am so happy to have 2012 over and done.  That year was kind of an overall fail for me.  But I've got high hopes and big plans for 2013 which will totally make up for last year.  Some of the plans include a more concerted effort and focus for my blog.  I'm going to focus more on fashion, with patterns, tutorials, style, jewelry, accessories, etc.  It's one of my main areas of interest.  I will also continue posts about food and DIY projects as I love those subjects, too, and don't want to give them up. :)  So, in practice the blog may not end up being very different, but I do plan on posting more frequently and trying to build something that will offer inspiration and help others be successful in their various projects.  And by "they" I really mean you, my wonderful, awesome readers!  Thank you so much for taking the time to visit, leave comments, and support me in my creative journey. 

My first post of 2013 is a tutorial for making a dramatic draped chain necklace.  It was inspired by those long necklaces with large circle links.  I've wanted one of those for a while but each necklace I found in stores was so lightweight and seemed that one tug from a small child would result in a broken necklace.  So, as often happens with things I would like to buy if they were available, but can't find, I ended up making one myself.  Thankfully it ended up being fairly simple. 

Cat on a Limb--2.jpg

NOTE: This tutorial requires some basic working knowledge of how to use jump rings and jewelry-making tools. There are tons of great guides out there for the very new beginner, but I just don't take the time to explain every detail here.

I gathered up a few different types and colors of chain. (Minus that one in the middle... my kids made off with it and I completely forgot about it while I was making the necklace. Haha, I guess "out of sight out of mind" works for me sometimes, too.)

Cat on a Limb-0640.jpg

I started with the two chains made of large circle links. I removed the extra small links on one end (used to connect more than one length of chain) to even them out.

Cat on a Limb-0641.jpg

I laid out the chains to plan the placement, and to make sure they would actually look good together before putting the work in to assemble the necklace. I also took a picture to help me remember how I wanted things to look.

Cat on a Limb-0643.jpg

The large circle chains turned out to be several inches too short for the length I wanted, so I added a couple of inches of regular chain on each side, plus a little extra for an extension, using two jump rings for extra reinforcement to help distribute the weight of the rest of the chains. (At least in my theory, haha)

Cat on a Limb-0646.jpg

Cat on a Limb-0645.jpg

I assembled the closure and added a metal bead dangling at the end of the extension.

Cat on a Limb-0648.jpg

Cat on a Limb-0650.jpg

Cat on a Limb-0651.jpg

Cat on a Limb-0657.jpg

For connecting the chains I started with the smaller circle chain and carefully laid it out so it would lay flat when worn, making sure it wasn't twisted at all. I placed the larger circle chain where I wanted it to connect with the longer chain, then attached it with jump rings.

Cat on a Limb-0642.jpg

After getting the first two connected, I found working on the necklace with it on my dress form helped.

Cat on a Limb-.jpg

Instead of having all the chains go completely around the necklace, I ended them, slightly to the back, securing them on the longer circle chain. I attached them all to one of the circles since it is solid, without a break, so it can't pull apart. For each chain I added, I started by attaching it to the solid circle with a jump ring, bringing it around to the solid circle on the other side of the necklace and adjusted it to the length I wanted.  Then I opened the chain, removed a link to make it that length, and attached it with a jump ring.

For me, the whole necklace, following the bottom chain, measures 33" with 2" extension.  The bottom chain alone measures 26". 

Cat on a Limb-0656.jpg

And all done!

Cat on a Limb--2.jpg

I really love it and I've already worn it more than once. Yay!

-------------------------------------------------------------------
I'll be linking up to these fabulous link parties:

Monday -  Craft o Maniac Monday -- Craftastic Monday -- Amaze Me Monday -- Make it Great Monday --  Tuesday -  Get Your Craft On -- Sew Cute Tuesday -- Upcycled Awesome -- Tip Me Tuesday -- Tuesday Talent Show --  Wednesday -  Sugar and Dots -- Wallet-Friendly Wednesday -- Create and Share -- Whatever Goes Wednesday --  Linkin’ with Lil’ Luna -- Thursday -  Strut your Stuff Thursday -- Transformation Thursday -- Thrilling Thursday -- Make It Wear It -- Friday -  Remodelaholic Friday -- Flaunt it Friday -- Frugal Friday -- Weekend Wander -- Show and Share Day -- It's Fun to Craft! -- Tickled Pink Fridays -- Weekend Wrap-up Party -- Catch as Catch Can -- Friday Flair -- Feature Yourself Friday -- Simply Link {Party} -- Pity Party -- Design Dazzle --  Saturday - Strut Your Stuff --  Lovely Crafty Weekend --  Sweet Saturday -- Sunday -  The DIY Showoff Project  Parade --  Sunday Showcase Party -- Creative Bloggers Party -- I Heart Naptime -- Think Pink Sundays

Sunday, December 11, 2011

Leather Obi Belt with 3D Flower

When I was making the belt for my high school reunion outfit I was rushing that day to get it finished in time to wear to the reunion. It was a little rough so I wanted to give it another shot, this time with a bit of a variation (also made using pieces of a former leather jacket). I altered the pattern for the petals and made them into a 3D flower.

Cat on a Limb-8648.jpg

I started out by making the petals of the flower. I altered the original petal design to be wider so I could fold it over and glue (using E6000 -- I'm sure there's some sort of leather glue that would be better, but I just wanted to stick with what I had on hand this time).

Cat on a Limb-8602.jpg

I altered the direction of the fold so the petals wouldn't all be exactly the same. Hint: Only use a tiny bit of glue, using too much will interfere when sewing them on to the belt.

Cat on a Limb-8604.jpg

I clamped them and let them dry overnight. Bonus = I finally found a use for the cute, tiny clamps I picked up on impulse one day -- I'm glad I did, they were exactly what I needed!

Cat on a Limb-8605.jpg

I cut out the other pieces in the same way as the previous obi belt, except with wider ties and added seam allowance around the edges of the main belt pieces.

Cat on a Limb-7467.jpg

I sewed a triangle piece to each side of the rectangular piece, making sure right sides were together, opened the seam allowance on the back side, top stitched on either side of the seam and clipped some of the excess away at the edges.

Cat on a Limb-8636.jpg

I folded over 1/2" around the outer edges and top stitched.

Cat on a Limb-8643.jpg

When transitioning from the triangular to the rectangular piece there was some excess bunched up, so I cut a small slit, close to, but not touching the edge, overlapped the sides and sewed.

Cat on a Limb-8637.jpg

Cat on a Limb-8640.jpg

Then I sewed the ties to the ends of each triangular piece.

Cat on a Limb-8644.jpg

Cat on a Limb-8645.jpg

I arranged the petals for the flower and secured them with just a tiny dab of glue. I used a spice jar (the perfect size!) to hold them down until they dried.

Cat on a Limb-8646.jpg

After the glue was dry I sewed the inner corners of the petals onto the belt.

Cat on a Limb-8647.jpg

And I had my new belt!

Cat on a Limb-8654.jpg

I really love this version of the belt. I ended up breaking three leather needles making this one, but I think it was worth it!

Cat on a Limb-8657.jpg

Cat on a Limb-8655.jpg

------------------------------------------------------------------

I'll be linking up to these fabulous link parties:

 Monday -  Craft o Maniac Monday -- Craftastic Monday -- Amaze Me Monday -- Make it Great Monday -- Polly Want 2 Party  --  Tuesday -  Get Your Craft On -- Sew Cute Tuesday -- Upcycled Awesome -- Tip Me Tuesday -- Tuesday Talent Show --  Wednesday -  Seven Thrity Three -- Wallet-Friendly Wednesday -- Create and Share -- Whatever Goes Wednesday --  Linkin’ with Lil’ Luna -- Thursday -  Strut your Stuff Thursday -- Transformation Thursday -- Thrilling Thursday -- House of Hepworths -- Friday -  Remodelaholic Friday -- Flaunt it Friday -- Frugal Friday -- Weekend Wander -- Show and Share Day -- It's Fun to Craft! -- Tickled Pink Fridays -- Weekend Wrap-up Party -- Catch as Catch Can -- Friday Flair -- Feature Yourself Friday -- Simply Link {Party} -- Pity Party -- Design Dazzle --  Saturday - Saturday Spotlight --  Sunday -  The DIY Showoff Project  Parade --  Sunday Showcase Party -- Creative Bloggers Party -- I Heart Naptime -- Think Pink Sundays

Sunday, November 27, 2011

Suede Flower Leather Obi Belt Tutorial

I hope everyone had a wonderful Thanksgiving holiday filled with gratitude, family, laughter and love!  I know mine was.  And now I'm fully embracing all the Christmas and holiday decorations, music, lights, projects, etc, etc.  Bring it on!  (Of course at the same time I'm kind of freaking out that I don't know what I'm going to do for gifts for everyone -- especially since our gift budget is basically non-existent.  I think most are going to involve some stash-liquidation on my part!)

Today I also realized that I never posted about the dress and belt I made for my 10 year high school reunion.  Here's the photo of the final product:

Cat on a Limb-7479.jpg

Today I'm going to share the tutorial for the leather and suede obi belt.

Cat on a Limb-7482.jpg

I started with a black leather jacket and a brown suede mini skirt I found at the thrift store on a 50% off day. (That's a great way to get leather at an affordable price, and reduce/reuse/recycle!) A while back I had cut out the lining, zippers, facings, etc and cut them into non-sewn-together pieces.

One of the things I love about leather is that it doesn't unravel or fray, so you can leave the edges raw. Of course folded and sewn edges have a more professional/finished look, but sometimes I'm just glad to be able to cut a corner here and there. :)

I started out by cutting the pieces using my quilting ruler and rotary cutter (I LOVE those things!).

Cat on a Limb-7467.jpg

Main rectangle: 5" wide x 17.5" long
(I'm tall and have a long torso, so I would suggest about 4" wide for a woman of average height. Also the length was my waist circumference in inches, divided by two, adding two inches, and adding one inch for seam allowance.)
Triangle pieces: 5" wide for 1/2", then down to a point x 12" long
(I just estimated this one, but it ended up being about 3/4 of half of my waist circumference, plus 1" for seam allowance.)
Ties: 3/8" wide x 20" and 18" long
(I totally estimated and just used the longest piece of leather I had. This is how long they ended up. One side is longer because the flower is slightly to the side and the straps tie at the center of the flower.)
Flower petals:  I drew the shape of a flower petal and traced it with a fabric pencil onto the suede.  I flipped the pattern over for a couple of the petals so they all would not be exactly the same shape.  I cut them out on the inside of the pencil line so I wouldn't have to worry about trying to wash/rub it off. 

Be sure to use leather needles. They are stronger and sharper than regular needles. I would also recommend using a thicker, stronger thread. It will help it all hold together well, and look better, too. If you have one, use a teflon or roller presser foot as well, since the suede side of leather tends to grip as it's going through the sewing machine and one of those feet will help it glide smoothly. (I didn't have one, but it still worked out pretty well, with some concerted effort.)

Cat on a Limb-7472.jpg


Start out by sewing the triangle pieces to the sides of the rectangle piece. Leather can't be pinned in the normal way, so I stuck pins straight in, inside the seam allowance (since once you put a hole in leather, even a tiny one, it won't go away).

Cat on a Limb-7474.jpg


After that, top stitch the seam on either side, both to give it a finished look and to lay the seam allowance down flat.

Cat on a Limb-7476.jpg


Then stitch all the way around the outer edge of the belt. For a more finished look you can simply fold over the edge and top stitch just like the other seam. Why didn't I do that? I have no idea... :) But if you do, be sure to add the extra width to the rectangle and triangle pieces to make sure your belt ends up the width that you want.

Cat on a Limb-7475.jpg


For the ties, trim the point off the triangle pieces to make it 3/8". Place the tie under the point, overlapping about 3/4" and sew it on by stitching back and forth several times in a straight line.

Cat on a Limb-7490-2.jpg

Visualize dividing the main rectangular part of the belt into thirds and place the flower petals on one of the dividing lines (so it's to one side, instead of in the middle). Glue them down with a small amount of glue (I used super glue since I needed something that would dry quickly) placed near the center of the petal, so the glue will not be in the way when you sew.  (I took this photo prior to sewing, since I was testing out how it would look, and I wanted to remember the placement of the petals when it came time to sew them on)

Cat on a Limb-7471.jpg

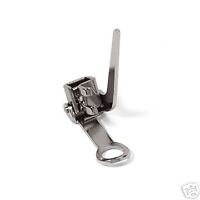
Using a free-motion presser foot (so you can turn smoothly while sewing -- see below), sew the petals on by stitching along the inside of the edge for each one.

Source

And then you are done!

Cat on a Limb-7482.jpg

Cat on a Limb-7488.jpg

Cat on a Limb-7490.jpg

------------------------------------------------------------------

I'll be linking up to these fabulous link parties:

 Monday -  Craft o Maniac Monday -- Craftastic Monday -- Amaze Me Monday -- Make it Great Monday -- Polly Want 2 Party  --  Tuesday -  Get Your Craft On -- Sew Cute Tuesday -- Upcycled Awesome -- Tip Me Tuesday -- Tuesday Talent Show --  Wednesday -  Seven Thrity Three -- Wallet-Friendly Wednesday -- Create and Share -- Whatever Goes Wednesday --  Linkin’ with Lil’ Luna -- Thursday -  Strut your Stuff Thursday -- Transformation Thursday -- Thrilling Thursday -- House of Hepworths -- Friday -  Remodelaholic Friday -- Flaunt it Friday -- Frugal Friday -- Weekend Wander -- Show and Share Day -- It's Fun to Craft! -- Tickled Pink Fridays -- Weekend Wrap-up Party -- Catch as Catch Can -- Friday Flair -- Feature Yourself Friday -- Simply Link {Party} -- Pity Party -- Design Dazzle --  Saturday - Saturday Spotlight --  Sunday -  The DIY Showoff Project  Parade --  Sunday Showcase Party -- Creative Bloggers Party -- I Heart Naptime -- Think Pink Sundays

Related Posts Plugin for WordPress, Blogger...